 Removing
the cable clip (800x600 JPG)
Removing
the cable clip (800x600 JPG)
I don't get many speeding tickets—the last one on a highway was over ten years ago. Still, better safe than sorry, so I bought a Valentine One radar detector from Valentine Research. I also bought the Concealed Display unit. I decided to use the Direct Wire Power Adapter (included with every V1) to power the V1 from a wiring harness in the roof rather than use the cigarette-lighter plug adapter. This allows the V1 to turn on automatically when the car is started, and eliminates the inconvenience of having a cord flopping around.
What follows below is the installation procedure for my 1999 BMW 540iA. This procedure may not be relevant to any other BMW model, or even to any other example of this model. Don't make any modifications to YOUR car unless you understand exactly what you're doing, and all the consequences of each change.
This is a simple process. It should take fifteen to thirty minutes at most. You'll need a flat-blade screwdriver, pliers, and a T25 Torx driver.
Removing
the cable clip (800x600 JPG)
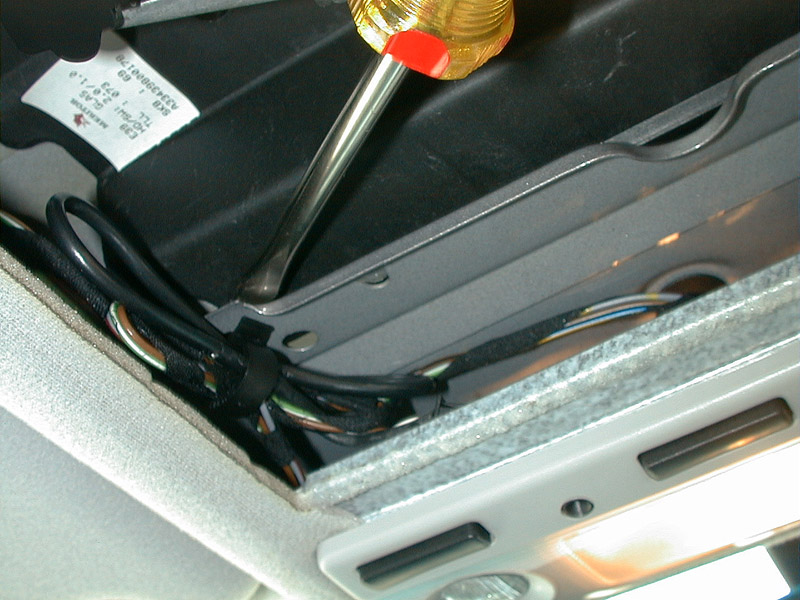
Start by opening up the panel in the headliner just in front of the sunroof opening and behind the forward cabin lights. You may find it easiest to pop out the light assembly, then reach up through that opening to pop out the panel. Let the panel dangle from the cable that attaches the sunroof control switch.
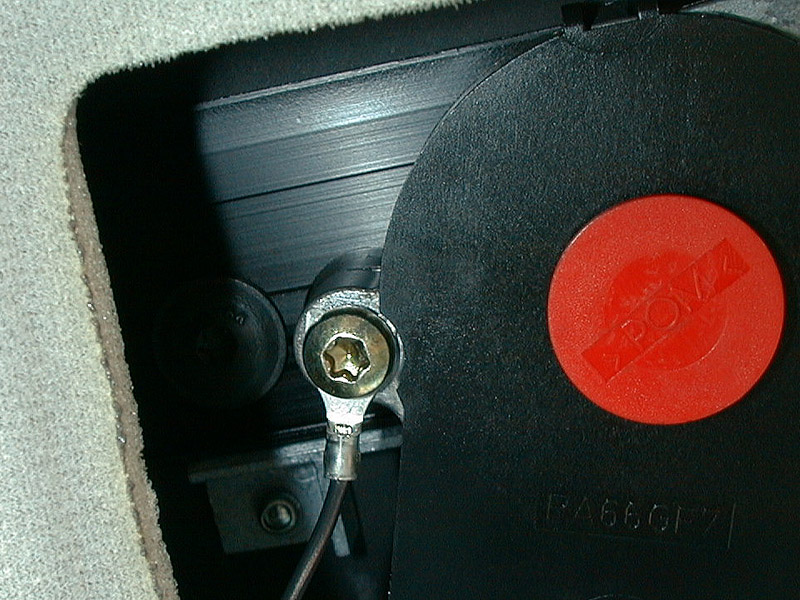
In the forward left corner of the space above the panel, you'll find a set of cables held by a plastic clip through the sheet metal. You'll be attaching the V1 power connector to one of these cables, so you need to remove the cables from the clip. Use a flat-bladed screwdriver as shown above to compress the fingers that hold the clip to the sheet metal, then pull down on the clip to pop it loose.
Beware of these cables! They're bound with a black cloth electrical tape that's quite sticky. The adhesive will come off onto your fingers. Don't let it get onto your headliner or anything else.
 The
power cable (800x600 JPG)
The
power cable (800x600 JPG)
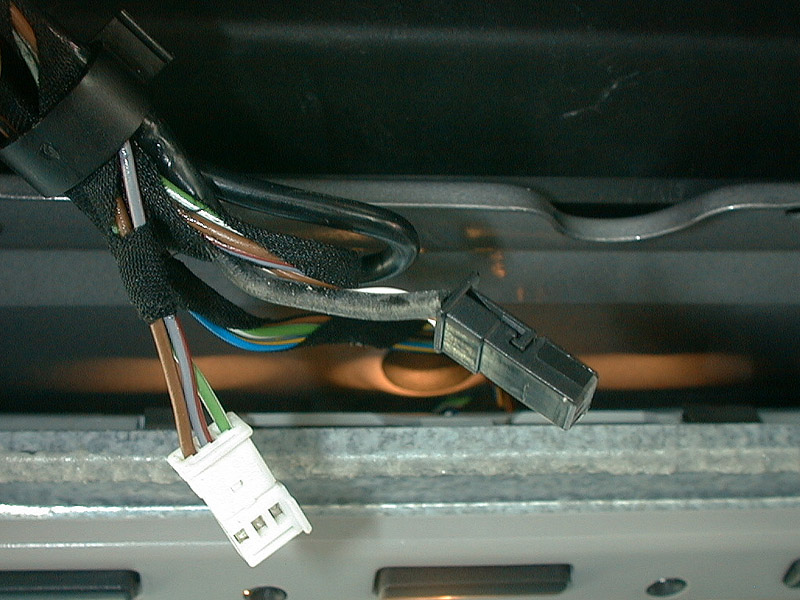
The cable with the white connector is the one you're looking for. The green wire carries 12V when the car is running, and is off when the car is off.
 The
new power connector (800x600 JPG)
The
new power connector (800x600 JPG)
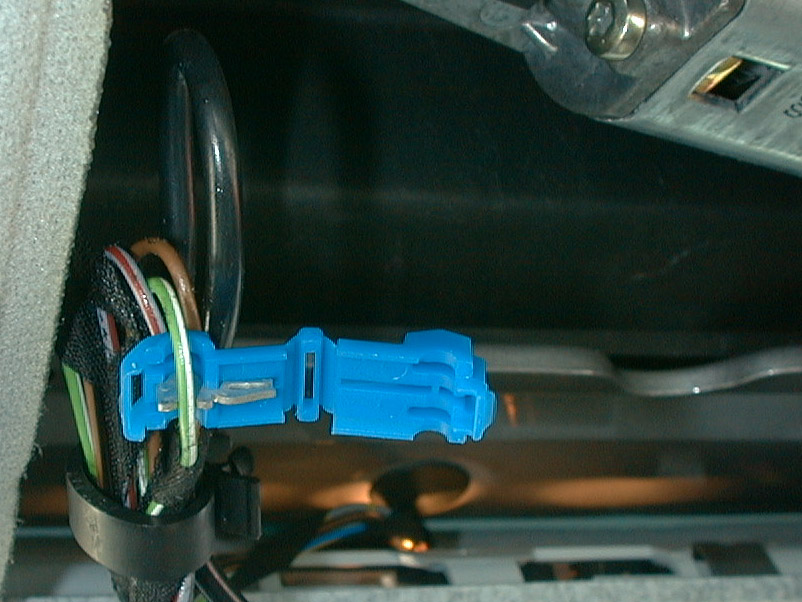
The blue connector shown here comes with the Valentine One. It mates with the power cable that goes to the Direct Wire Power Adapter. I chose to attach the connector up near the first fold in the cable, about 4" away from the white connector at the end of the cable.
Hook the blue connector through the cable as shown so that the green wire is held at the entrance to the contact. This type of contact works by cutting through the wire's insulation and squeezing the wire itself, so there's no need to strip the wire.
 Crimping
the connector (800x600 JPG)
Crimping
the connector (800x600 JPG)
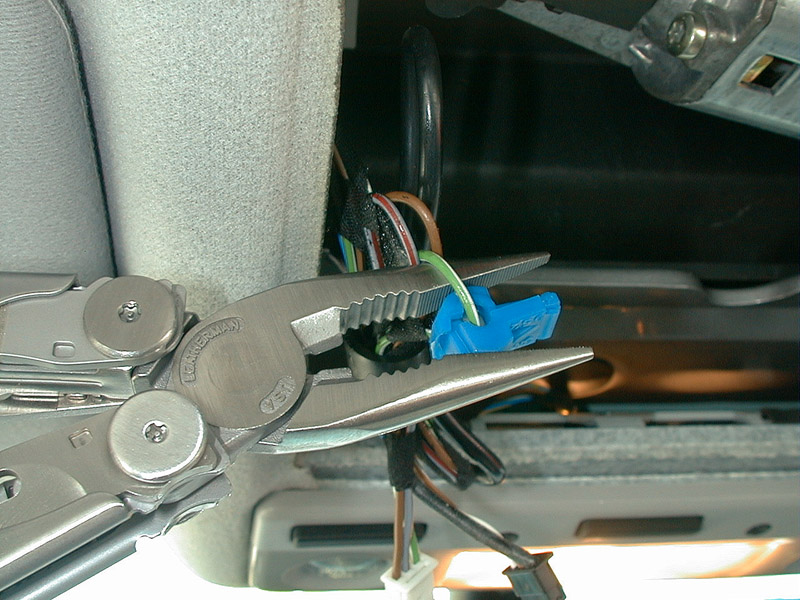
I used a Leatherman Wave tool to crimp the connector just because I keep one in the car. Any pliers will work. Fold the connector over, make sure the green wire is still in the right place, and squeeze it closed until the latch clicks. You're done.
 Testing
for 12V (800x600 JPG)
Testing
for 12V (800x600 JPG)
Before proceeding, be sure to verify that the connector is properly installed. Use any voltage meter to check for a nominal 12V (could be 11.5 to 14V or so) on the blue connector when the car is running, and 0V when the car is off. Use any convenient mounting screw for your ground reference, and probe into the side of the blue connector as shown to look for power. If you find it there, the Valentine One will be okay too.
 The
ground wire (800x600 JPG)
The
ground wire (800x600 JPG)
The ground wire may be attached to any convenient mounting screw in the compartment. It has a spade lug that fits well on the T25 Torx screws used to hold the sunroof motor as shown here..
 Removing
the cable clip (800x600 JPG)
Removing
the cable clip (800x600 JPG)
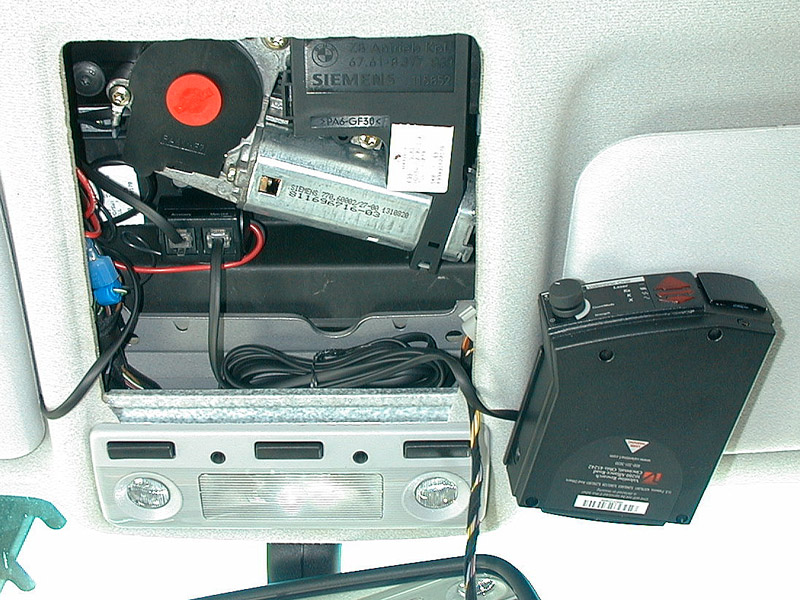
The Direct Wire Power Adapter can be attached using the provided Velcro to the underside of the roof as shown here. The DWPA has one connector for the V1 itself, plus another for the Concealed Display unit. Plug in the two cables and route them as shown, tucking in the unneeded cable. Don't forget to reinstall the cable clip where you found it.
At this point, you should test the system. If it's working, go ahead and button up.
 The
remote display (800x600 JPG)
The
remote display (800x600 JPG)
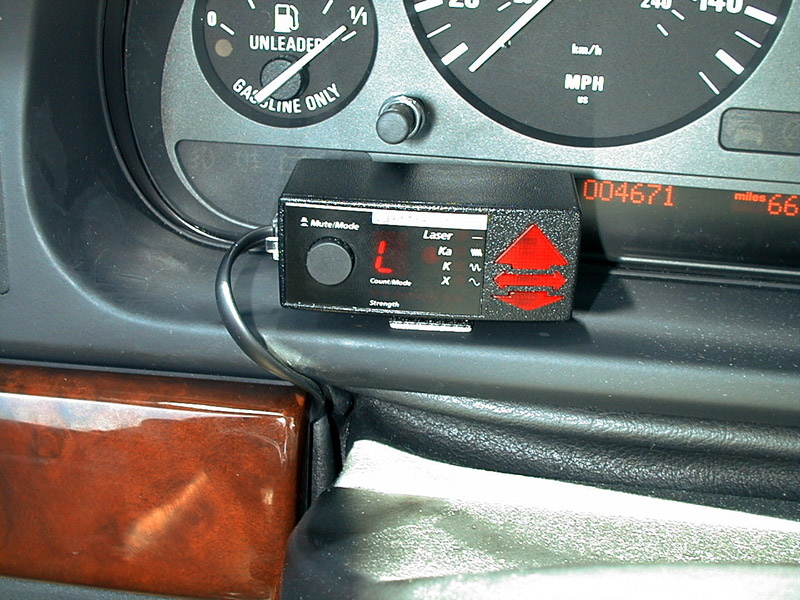
I put the remote display in the lower-left corner of my dashboard. In this position, it partially blocks the service interval lights and the check lights for the engine and oil level. With the display as close to the rear of the car as possible, however, these indicators are still visible from the side or over the top of the display.
You may want to put the display somewhere else, or just skip it entirely; the V1 will still work just as well without it.
 The
final result (800x600 JPG)
The
final result (800x600 JPG)
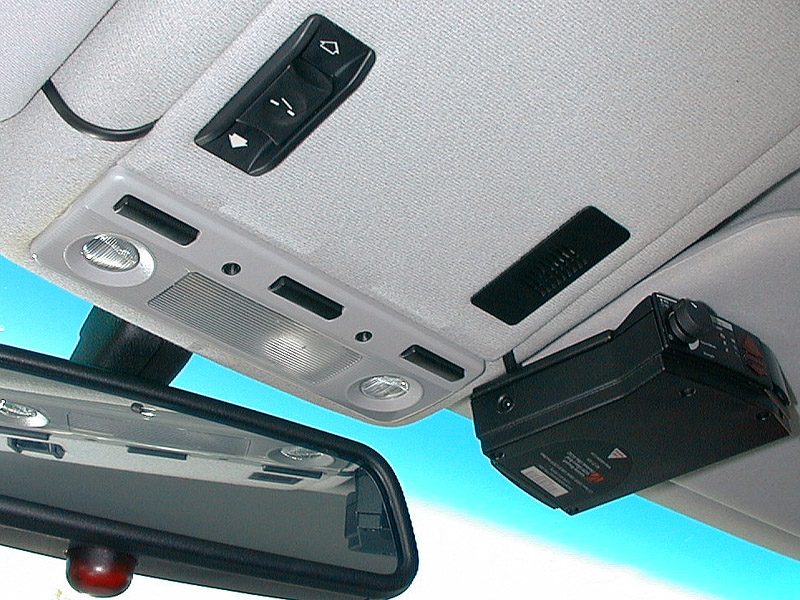
Here's a view of the final result. The cables aren't particularly visible from outside the car, but I'm thinking about replacing them with something in a light gray. I'm also thinking about painting the V1 itself with a light-gray paint. I'll update this page if I do.
If you have comments or suggestions, please email me at png@ideaphile.com.
All content copyright 1996-1999 by Peter N. Glaskowsky. All rights reserved.